|
In this tutorial ,we are going to use “Docker: Enterprise Container Platform” (docker.io) on Ubuntu 19.10.First Installation of Docker on Ubuntu 19.10 On the Ubuntu terminal sudo apt install docker.io Then a zoneminder-docker image is built using a Dockerfile and entrypoint.sh Dockerfile contains the scripts to install free open-source software Zoneminder and entrypoint.sh has necessary commands to start Zoneminder ,Apache and other services and to keep the docker container running. I have used my own Dockerfile and entrypoint.sh prepared by Andrew Bauer The scripts in the Docker file are as shown in the following figure:- 1 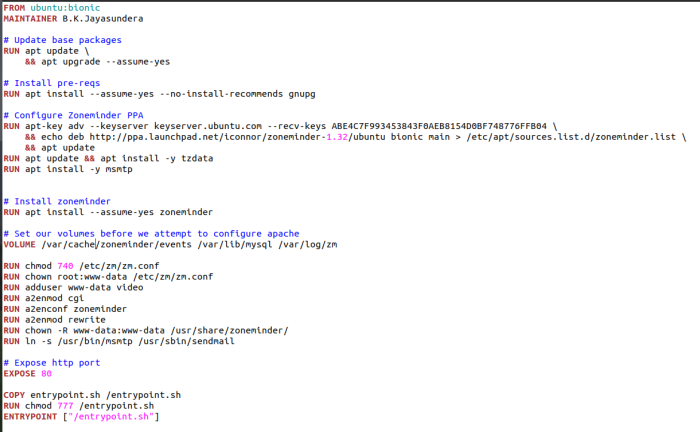 Figure:- 1 Scripts in the Dockerfile For the purpose of building the zoneminder- docker image the files Dockerfile and entrypoint.sh are saved on the Documents folder of the computer as shown in the following figure:- 2. 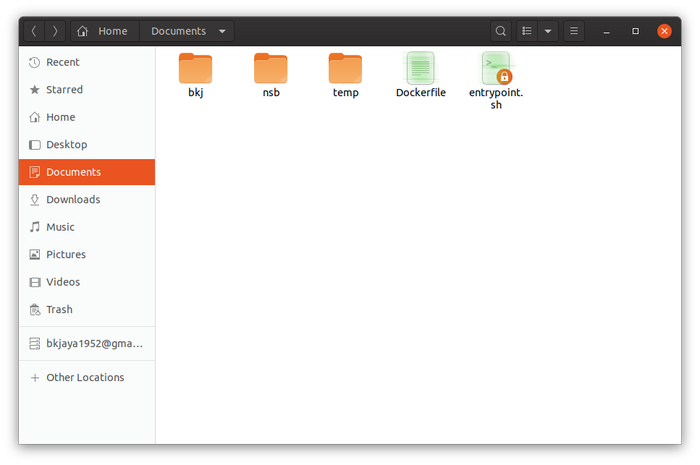 figure:- 2 Dockerfile and entrypoint.sh marked in green color saved in the Documents folder The Dockerfile and entrypoint.sh can be downloaded from this links Dockerfile entrypoint.sh Building the Zoneminder-Docker image ( tagged as “yourzoneminder”) Open the Ubuntu terminal cd ~/Documents sudo docker build --tag=yourzoneminder . # Dockerfile ( The process will take about 10-15 minutes) After the image building process is finished ,you find the image by runng sudo docker images For the purpose of identifying the image in the Docker Hub , you will have to tag it with an appropriate name . In our case ,I have name as “bkjaya1952/docker-zoneminder:v1.32.3.” sudo docker tag yourzoneminder bkjaya1952/docker-zoneminder:v1.32.3. Then push the tagged image to the Docker Hub sudo docker login Note : first you will have to signup & open a Docker Hub account at https://hub.docker.com/ sudo docker push bkjaya1952/docker-zoneminder:v1.32.3.  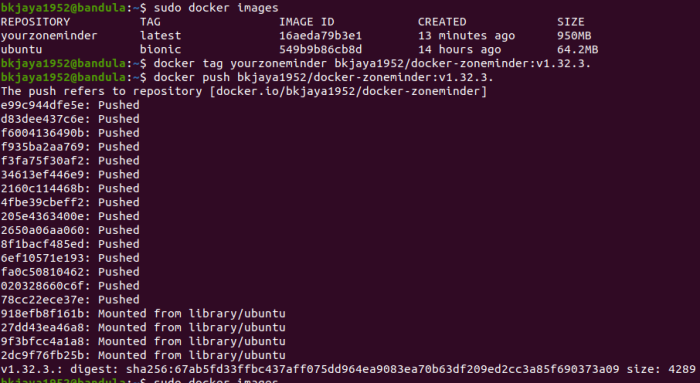 Figure:- 3 Tagging and pushing the image to the Docker Hub Now you can see my pushed image at https://hub.docker.com/repository/docker/bkjaya1952/docker-zoneminder 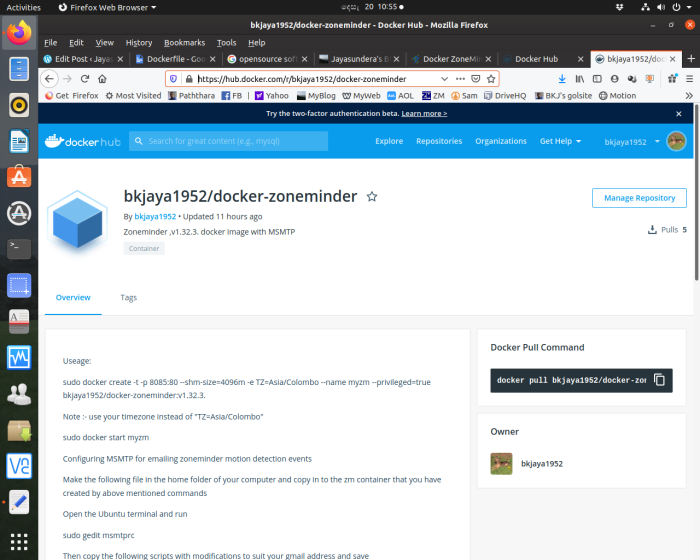 Figure:- 4 Pushed image at the Docker Hub The instructions to use the image has been entered at the Docker Hub, after the pushing is completed . Usage of the pushed image bkjaya1952/docker-zoneminder sudo docker create -t -p 8085:80 --shm-size=4096m -e TZ=Asia/Colombo --name myzm --privileged=true bkjaya1952/docker-zoneminder:v1.32.3. Note :- use your timezone instead of "TZ=Asia/Colombo" sudo docker start myzm Configuring MSMTP for emailing zoneminder motion detection events Make the following file in the home folder of your computer and copy in to the zm container that you have created by above mentioned commands Open the Ubuntu terminal and run sudo gedit msmtprc # Set default values for all following accounts. defaults auth on tls on tls_trust_file /etc/ssl/certs/ca-certificates.crt logfile ~/.msmtp.log # Gmail account gmail host smtp.gmail.com port 587 from youer gmail address user youer gmail address password your gmail password # Set a default account account default : gmail Then copy the created msmtpru file to the folder /etc/ of the zm container as follows sudo docker cp msmtprc myzm:/etc/msmtprcOpen http://localhost:8085/zm/ and add the camera monitors 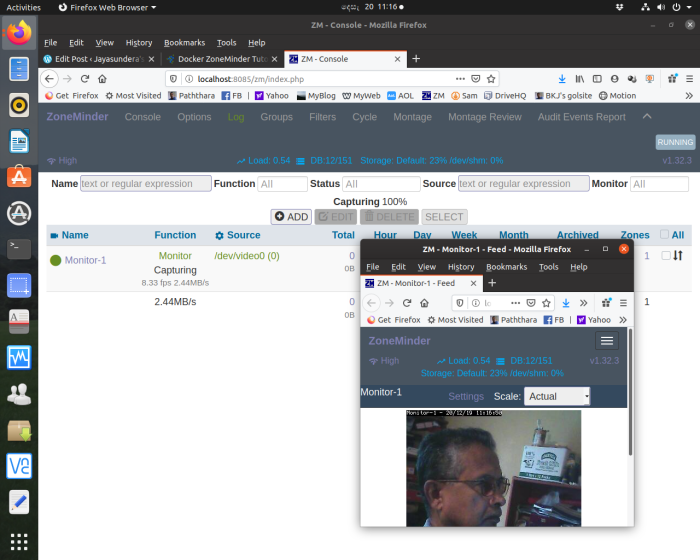 Figure:- 5 Added USB camera to Zoneminder And fill up email details under the Optons/email of the ZM-Panel Create appropriate zm-filter to send email alerts of motion detection events For entering e mail details and creating zm-filter please refer my following blog ( After the Figure:- 3 in the blog) How to install Zoneminder 1.32 (with MSMTP email support ) in Docker on Ubuntu 19.10 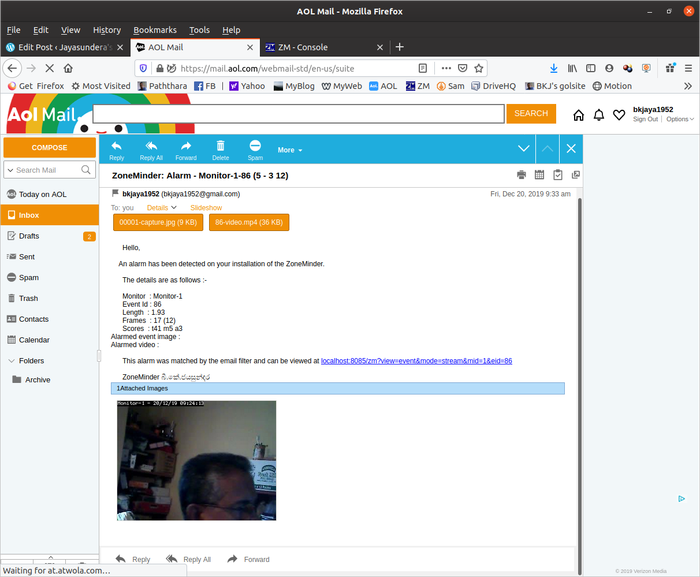 Figure:- 5 Received motion detection email alerts from Zoneminder
Acknowledgements : Based on Isaac Connor’s Zoneminder and Andrew Bauer’s [email protected] entrypoint script at https://raw.githubusercontent.com/ZoneMinder/zmdockerfiles/master/utils/entrypoint.sh
0 Comments
|
AuthorRetired Director of Irrigation ,Sri Lanka Categories
All
Archives
March 2020
|
 RSS Feed
